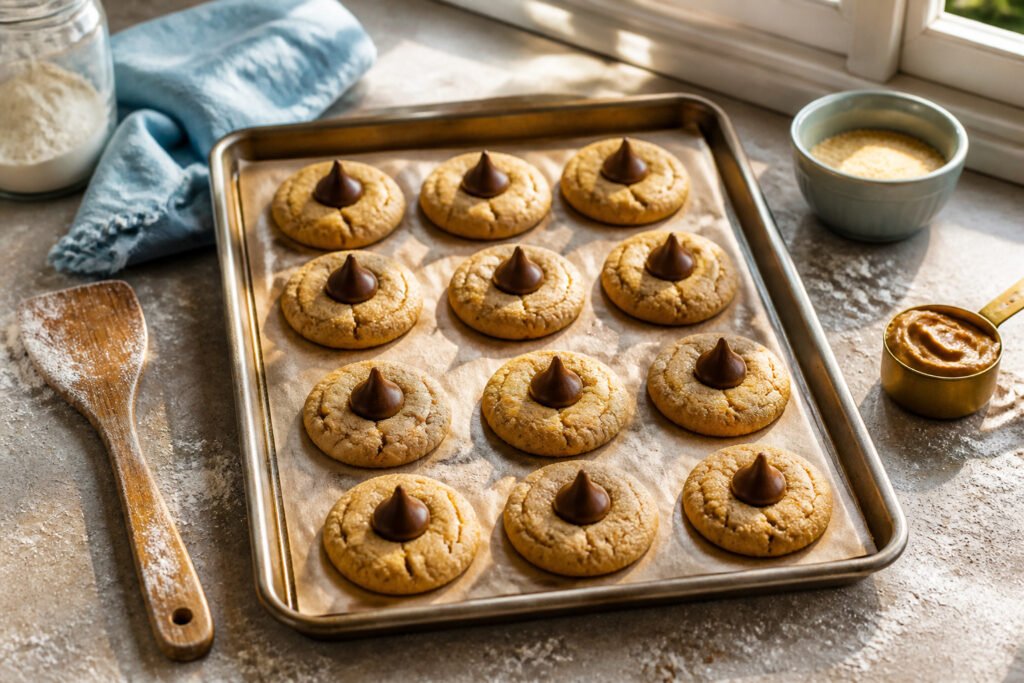
Soft, chewy peanut butter cookies with a crackled sugar crust and a chocolate kiss pressed into the center while still warm.
What separates a neat blossom from a melted puddle is timing: press the candy in at two to three minutes off the heat, no sooner and no later.
The dough needs a full hour in the refrigerator or the cookies spread to pancakes, and the batch costs about fifteen cents per cookie if you buy holiday bags of Kisses and store-brand peanut butter.
Total time: two and a half hours, mostly chilling.
Peanut Butter Blossoms

Peanut butter blossoms are soft, chewy peanut butter cookies with a crackled sugar top and a single chocolate kiss pressed into the center while they are still warm from the oven.
The recipe first appeared in 1957 as an entry in the Pillsbury Bake-Off, where it won under the name "Chocolate Candy-Topped Peanut Butter Cookies" and quickly became a holiday staple.
The original version used chocolate stars, but Hershey’s Kisses became the standard once they were widely available, and most recipes now specify them.
This is a single classic recipe, not a roundup of variations, and the method that produces the cleanest look adds the kisses after baking so the chocolate adheres without melting out of shape.
Ingredients

This batch makes 48 cookies, which is the count most home bakers actually want for a holiday party or a cookie swap. The ingredient list is short enough that I can usually shop from a half-stocked pantry.
- 1/2 cup butter, room temperature
- 1/2 cup creamy peanut butter (not natural; the emulsified kind holds the dough together)
- 1/2 cup granulated sugar, plus extra for rolling
- 1/2 cup packed brown sugar
- 1 egg
- 2 tablespoons milk
- 1 teaspoon vanilla
- 1 3/4 cups all-purpose flour
- 1 teaspoon baking soda
- 1/2 teaspoon salt
- About 48 Hershey’s Kisses, unwrapped
The sugar for rolling is not optional; it gives the crinkled surface that the chocolate presses into. I unwrap the Kisses while the first tray bakes so I am not tearing foil with oven mitts on.
Method
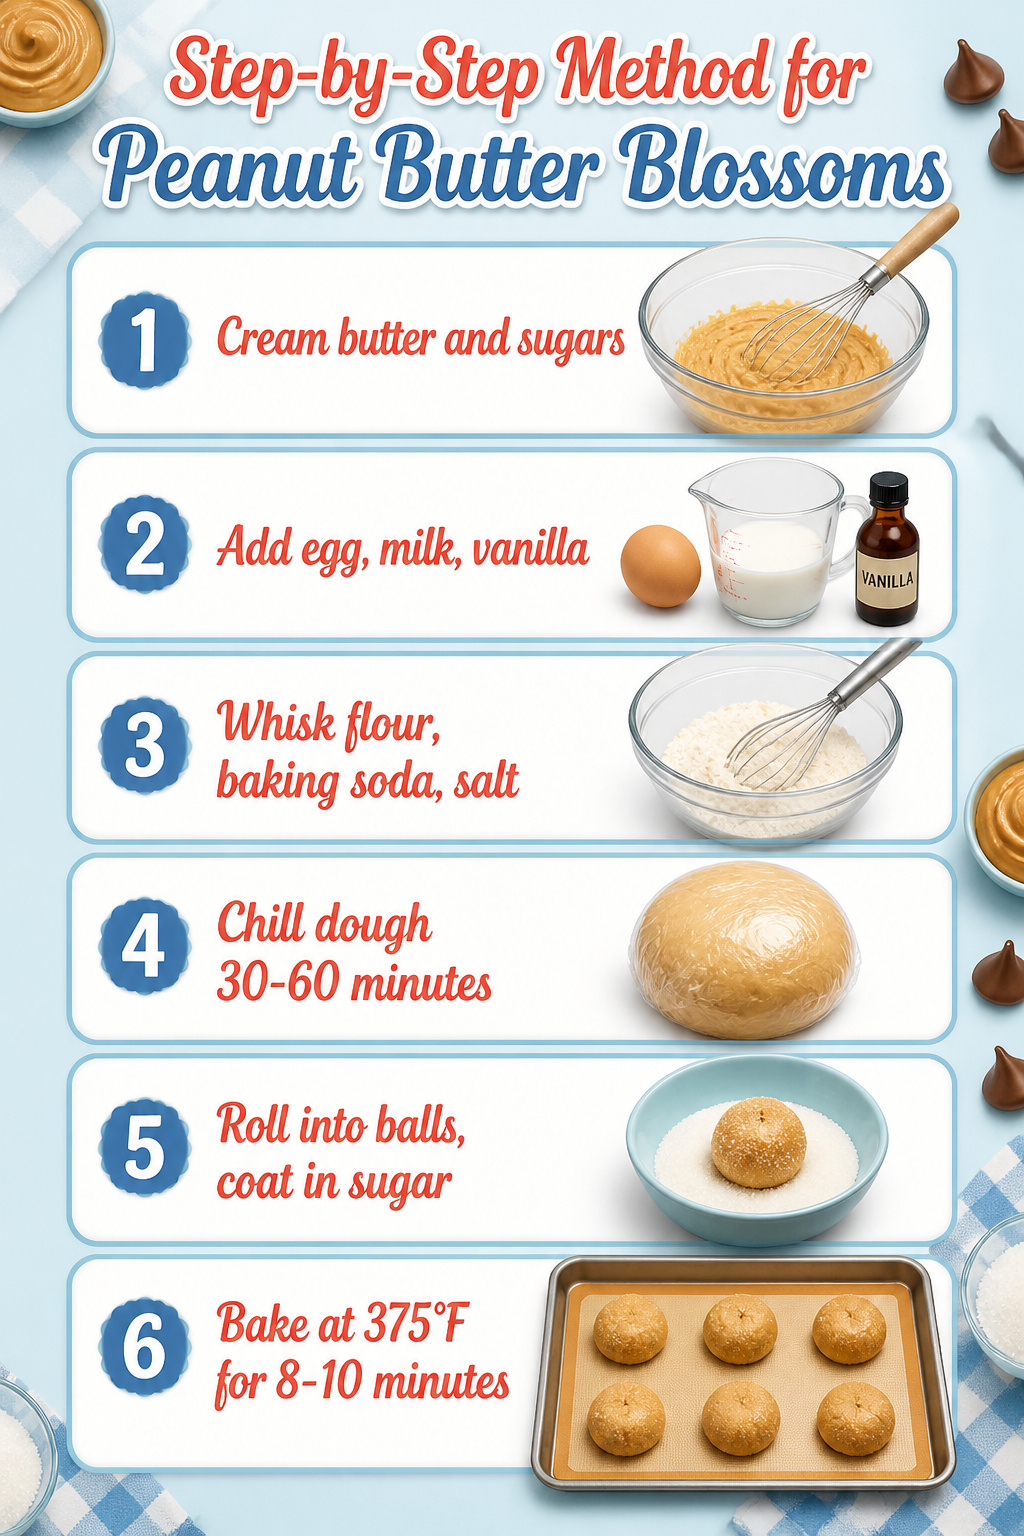
- Cream the butter, peanut butter, granulated sugar, and brown sugar together until the mixture turns light and fluffy, about two minutes on medium speed. Scrape down the bowl once or twice so nothing hides at the edges.
- Beat in the egg, milk, and vanilla. The dough goes from sandy to smooth quickly here; once it looks uniform, stop.
- Whisk the flour, baking soda, and salt in a separate bowl, then add to the wet ingredients. Mix until just combined. Overworking at this stage makes the cookies dense, not tender.
- Chill the dough 30 minutes to 1 hour. The batch I rushed at 20 minutes spread more than I liked; the full hour holds the shape cleaner and makes rolling far less sticky.
- Roll into 1-inch balls, then coat each in granulated sugar. A shallow cereal bowl works better than a plate; you can swirl the dough around without chasing it.
- Bake at 375°F for 8–10 minutes, until the tops look puffed and the edges turn lightly golden. The centers will still seem soft; they finish setting on the hot sheet.
- Press the Kiss in immediately, while the cookie is warm enough to melt the base flat but not so hot the chocolate loses its shape. Two to three minutes off the heat hits the window right. Too soon and the Kiss sinks through; too late and it perches on top like a hat.
- Cool on the baking sheet 2 minutes, then transfer to a wire rack. The chocolate needs that first hour to fully set before you stack or store.
Yield and Scaling

A standard batch yields 48 cookies when scooped with a 1-inch disher, which is the size most home bakers already own.
The dough rolls cleanly and the bake time holds steady at 10 minutes, 8 minutes for the first pass plus 2 minutes after you press in the Kiss.
For a smaller gathering, halving the recipe gives you 24 cookies and uses exactly 24 Kisses. The mixing time drops and the bake fits on one sheet, but the dough still needs that hour in the fridge or it spreads.
A smaller scoop, maybe a melon-baller, turns out roughly 60 bite-size cookies.
The bake shrinks to 7–8 minutes total; skip the second oven stint and press the Kiss in right at the end, since the shorter bake leaves less margin for melting the chocolate.
Per-cookie cost lands around $0.15 if you buy store-brand peanut butter and grab the Kisses in holiday bags, which run cheaper per ounce than the everyday strip.
Storage
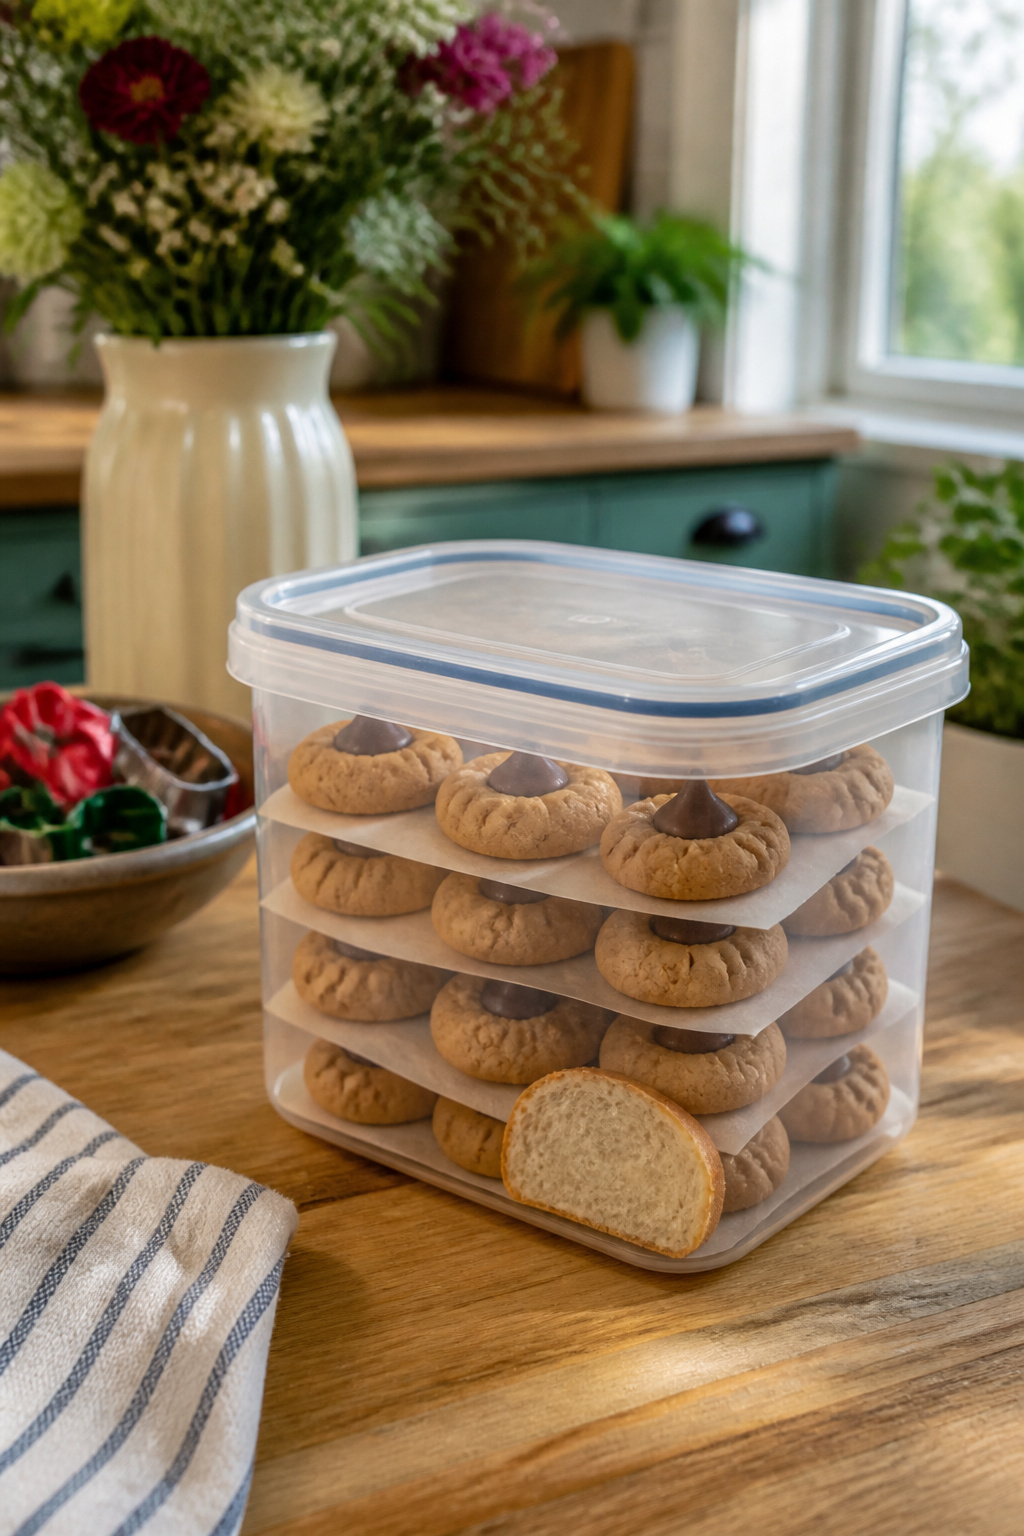
A cooled batch of peanut butter blossoms sits on the counter, and the chocolate Kisses on top are still soft enough to smudge if you rush. I learned that the hard way with a lid pressed on too soon.
Wait until the chocolate has re-solidified before you stack anything, then move them to an airtight container.
Room temperature keeps them good for up to 5 days, though one source caps it at 3, so I treat 3 days as the safer bet for a party platter and stretch to 5 only for home snacking.
The bread trick actually works. I tuck a halved slice into the container, and the cookies pull moisture from it instead of turning crumbly.
When the bread dries out, swap in a fresh piece. In humid kitchens, parchment between layers saves you from prying apart a stuck-together stack.
Waxed paper does the same job if that is what you have on hand.
Freezing Dough and Baked Cookies

Freezing the dough is the move that keeps peanut butter blossoms within arm’s reach without the full prep session.
I roll the dough into 1-inch balls and line them up on a parchment-covered baking sheet, then slide the whole sheet into the freezer uncovered.
Two hours gets them solid enough to bag without sticking together; from there they’ll keep in a resealable freezer bag for up to 3 months. Most bakers freeze the dough balls and pop them straight into the oven later.
One route is to let the balls sit at room temperature for about 30 minutes, then roll in sugar and bake as usual.
The faster path, and the one I default to when the oven’s already hot, is to bake from frozen and add 2 extra minutes to the timer.
No sugar coating before freezing; that step waits until right before baking, or gets skipped entirely if you’re in a rush.
Baked cookies freeze too, though not every source agrees on this. I’ve had fine results layering cooled cookies in a rigid container with parchment between each row, keeping them for up to 2 months.
The Hershey’s Kisses need a heads-up: they will sweat slightly as they thaw at room temperature, then the surface re-sets to its original sheen. Frozen cookies take a few minutes longer but come out indistinguishable from fresh.
Peanut Butter and Butter
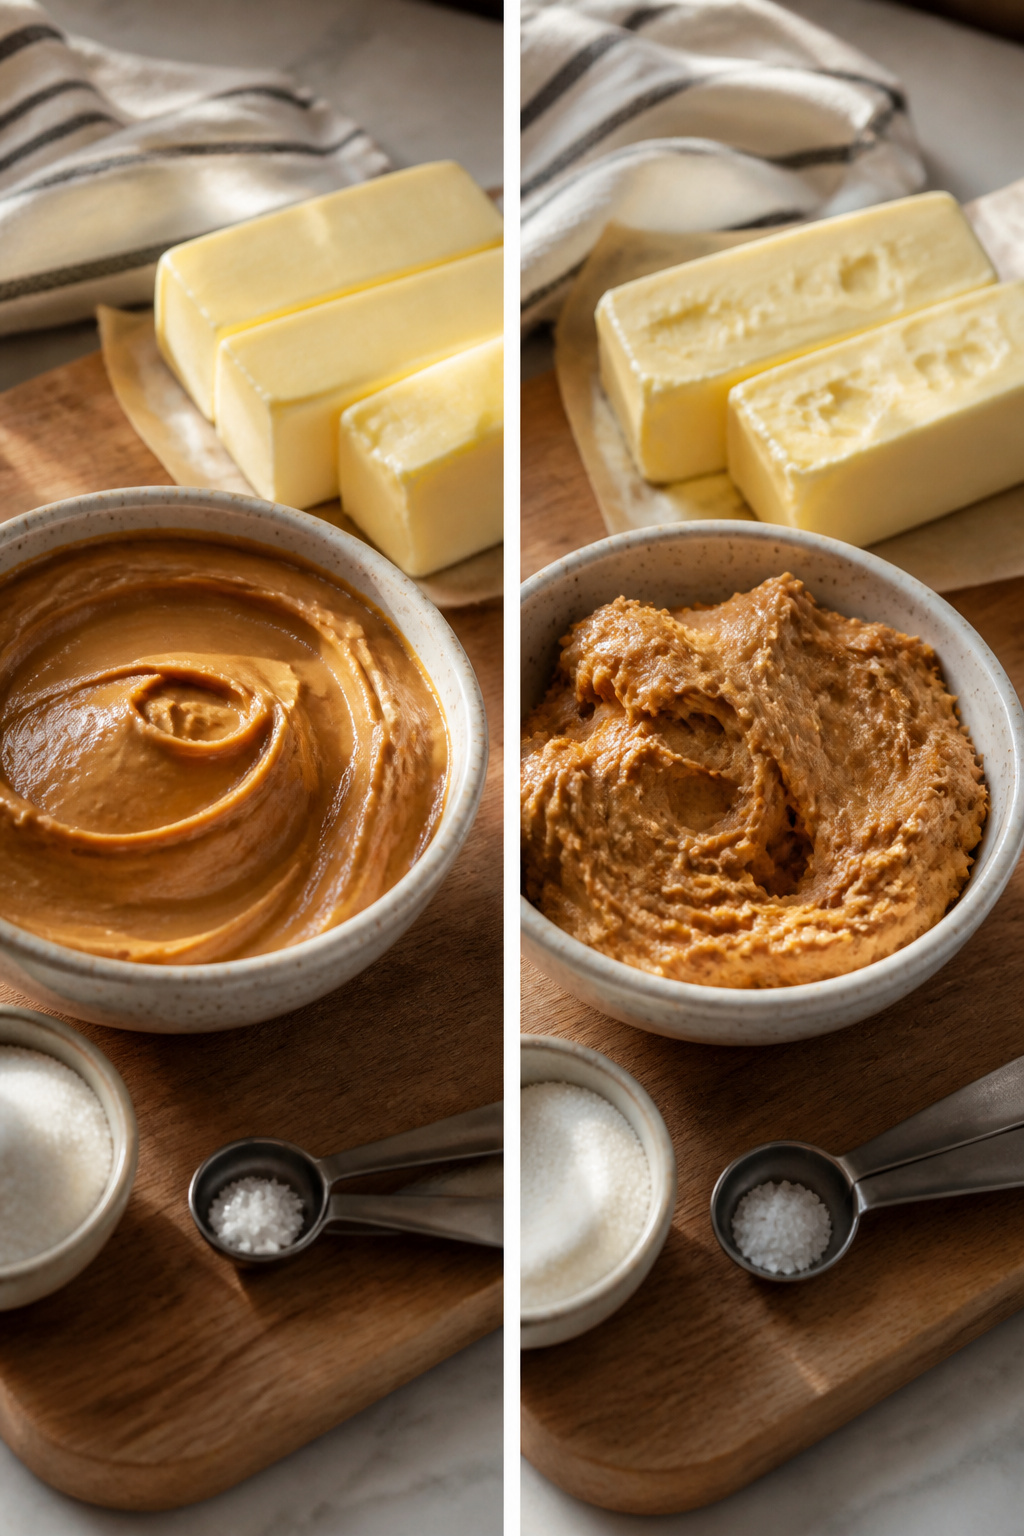
Creamy peanut butter from the national brands wins here. Natural peanut butter separates in the jar and bakes into oily, flat disks.
I have tried natural twice, and both batches spread to pancakes.
Room temperature butter creams into the sugar properly and builds the right structure. Cold butter leaves lumps that never smooth out, and warm butter turns the dough greasy before it even hits the oven.
Butter that dents under a gentle press but still holds its shape works best; about 65–68°F if you want to check with a thermometer.
Softened unsalted butter is what you need, and if salted is all you have, pull back the added salt by a quarter teaspoon.
Chilling the Dough

Cold butter in the dough is what keeps a peanut butter blossom round instead of flat. Thirty minutes in the refrigerator is the minimum; an hour firms it up enough that the cookies hold their shape through the full bake.
The dough also rolls into balls far more cleanly when it has chilled, which matters more than you’d think with a soft peanut butter dough.
I have skipped this step when I was behind schedule, and the flavor was still there, but the cookies came out looking like small plates. The spread was that dramatic.
If your kitchen runs warm or you are working in summer, the longer chill is worth the wait. Cover the bowl tightly with plastic or reusable wrap so the dough does not dry out on top.
Chocolate Kiss Timing

The chocolate kiss lands in a narrow window. Pull the tray from the oven and count to about two minutes, then press each candy slightly more than halfway into the warm cookie.
The residual heat softens the peanut butter just enough to grip the kiss without collapsing it.
Press too early and the chocolate melts to a flat puddle; wait too long and the cookie sets, leaving the kiss perched on top like a hat that refuses to stay on.
Some bakers freeze the kisses first to buy extra time. The freezer does slow melting, and a chilled tray of finished cookies cools them faster for eating sooner.
My own sheet rarely fits in the freezer, and working quickly off the hot pan has always been enough. The two-minute rule holds either way.
Sunflower Seed Butter

Sunflower seed butter swaps in at the same weight for anyone avoiding nuts, which I did last year when my niece visited.
The dough spreads a touch more in the oven, so leave an extra half inch between scoops or you’ll have one lumpy sheet.
The real surprise is the color: a reaction between the seed butter and baking soda can turn the centers green, especially around the kiss. It is harmless, just startling if you are not expecting it.
Dropping the soda to 3/4 teaspoon keeps the shift subtle without changing the rise enough to matter. The flavor stays mild and slightly earthy, closer to raw sunflower seeds than peanut butter’s roast, so the chocolate stands out more.
Not worse, just different, and the green-center stories at the cookie swap were almost worth the panic.
Chocolate Variations

Hershey’s Kisses come in dark, milk, and flavored versions, and any of them will technically work.
The dark chocolate holds its shape longer in a warm kitchen, which matters if you are pressing them into a full sheet pan and working slowly.
Flavored varieties, pumpkin pie or mint or whatever limited edition is on the shelf, muddy the classic peanut butter-chocolate pairing in ways that read as mistake rather than twist.
Mini peanut butter cups pressed in sideways make a reasonable substitute when the holiday baking aisle is picked over. The ratio shifts, more filling to less chocolate, and the cookie ends up sweeter and softer in the center.
I have used almond kisses when that was what I had; the flavor clash was minor but noticeable, a faint marzipan edge that hung around after the chocolate. Stick with plain milk chocolate for the classic profile.
It is what people expect when they reach for one, and the nostalgia is half the point.
Decorative Sugar

Colored decorating sugar turns peanut butter blossoms into something that reads seasonal without touching the recipe itself. I keep a few jars on hand: red and green for Christmas, pastels when I’m bringing a plate to a spring shower.
The swap is one-for-one with the granulated sugar you’d normally roll the dough in, so the technique doesn’t change.
That sugar coating isn’t just for looks. It gives the baked cookie a slight crunch against the soft center, a textural contrast that plain white sugar doesn’t quite deliver.
Coarse sparkling sugar or turbinado work the same way if that’s what you have. Sprinkles are another option, though they read more playful than polished.
I press them on gently so they don’t sink into the dough during baking.
One practical note: unwrapping the Hershey’s Kisses while the first batch is in the oven saves the scramble later.
The cookies come out soft and need that chocolate center pressed in immediately; a few seconds of fumbling and the surface starts to set before the kiss can settle.
Gluten-Free Flour

A 1:1 gluten-free blend with xanthan gum substitutes directly for all-purpose flour in peanut butter blossoms. The cookies spread more and crumble slightly, so chilling the dough becomes essential rather than recommended.
King Arthur Measure for Measure and Bob’s Red Mill 1-to-1 both work well here. Do not use straight almond flour; the texture turns sandy and the cookies fall apart on the plate.
The blend needs that binder to hold the fat and sugar together the way gluten would.
Frequently Asked Questions
Can I make peanut butter blossoms ahead of time?
Yes. Roll the dough into balls and freeze them on a parchment-lined baking sheet for about 2 hours, then transfer to a resealable freezer bag for up to 3 months.
Baked cookies also freeze well for up to 2 months layered with parchment in a rigid container; the Kisses will look slightly sweaty as they thaw but return to normal within 20 minutes.
What kind of peanut butter should I use?
Use creamy peanut butter from a national brand like Jif or Skippy, not natural peanut butter. Natural varieties separate into oil and solids and bake into flat, greasy disks.
The emulsified stabilizers in conventional brands hold the dough together so the cookies keep their round shape.
How do I prevent the Hershey’s Kisses from melting?
Press the Kiss into the warm cookie 2 to 3 minutes after the tray leaves the oven, not immediately. That window is hot enough to melt the base flat so it adheres, but cool enough that the chocolate keeps its pointed shape.
Some bakers also chill the unwrapped Kisses first to buy extra time.